可预测的结果
我们的方法可以避免猜测。通过测定种植体稳定性获得客观值,Osstell 可以让每位患者的种植体治疗更具可预测性且更可靠。
最佳治疗时间
即刻负重的需求越来越常见。患者希望快速获得立竿见影的效果。使用Osstell®,避免无效等待时间。
可靠的方法
我们的方法基于RFA,依托1500多项科学研究成果,可确定种植体是否足够稳定。结果显示为 1-99 的ISQ值。ISQ 越高,种植体越稳定。
提高种植体治疗效果
OsstellConnect是一种免费的基于云的解决方案,为临床医生提供了一种新方法,通过数据提高牙种植体治疗效果。它是世界上最大的种植体在线门户,拥有超过25万个数据点。OsstellConnect目前是免费的,可供Osstell Beacon和Osstell IDx访问。
登录通过 W&H 的 Implantmed 和 Osstell Beacon 实现精确性和可靠性
W&H 的 Implantmed plus 与 Osstell Beacon 相结合,为安全和精确的种植过程保驾护航,是一款理想的解决方案。Implantmed 具有自动扭矩控制等功能,可实现安全的种植体插入和螺纹车刀功能,进而提高精确度,确保易用性和准确性。Osstell Beacon 可在屏幕上直接显示实时 ISQ 稳定性测定结果,进而简化记录并支持最佳的患者治疗结果,进一步增强这种体验。
了解 Implantmed+Beacon 产品包,为您的诊疗实现更高的精确度。
了解与 W&H 的解决方案有关的更多内容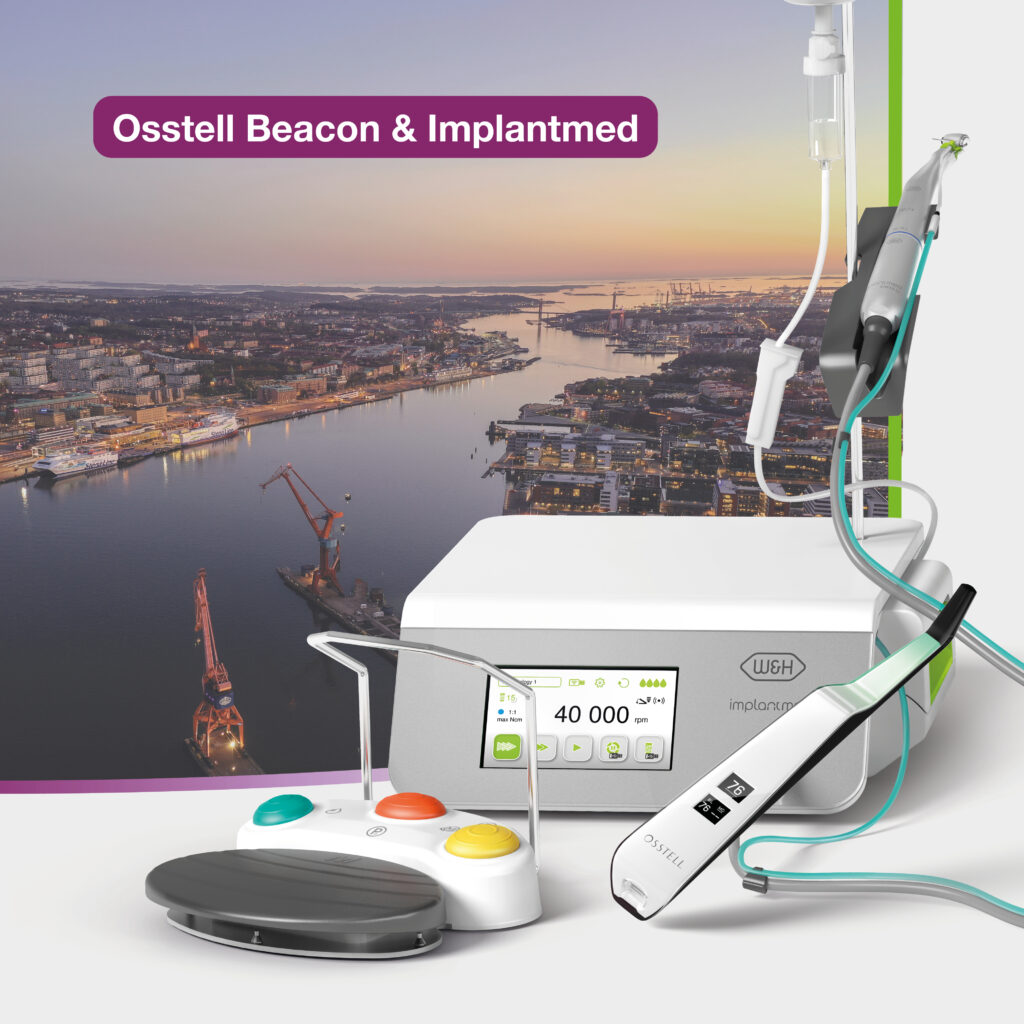
视频

使用Osstell Beacon测量种植体稳定性
Osstell Beacon可在几秒钟内确定种植体稳定性。在本视频中,我们将向您展示如何测量。如需更多分步指南,请访问OsstellConnect帐户中的“帮助”部分。
转至OsstellConnect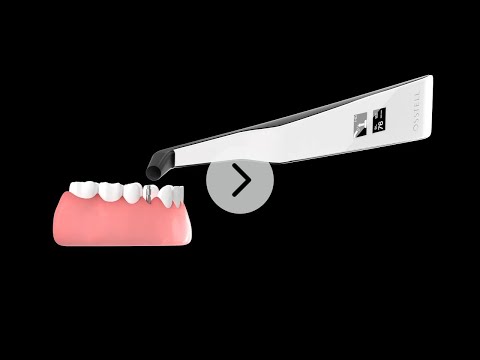
Search for distributor
Frequently asked questions
Got a question regarding Osstell Beacon? Our FAQ is the fastest way to get help. Below you will find the most frequently asked questions regarding Osstell Beacon. If you can’t find the answer you are looking for, don’t hesitate to contact us.
Charge the Beacon for at least 30 min in room temperature, then try again. If the error remains, try resetting the device by:
1. Identify the Beacon reset pin on the picture below.
![]()
2. With a paper clip, do a gentle press for 1 second on the reset button (Note! You may have to tilt the pin a little downwards).
If you see a “PadLock” symbol in the upper display, press one more time on the reset button.
If the Beacon still doesn’t start or the display is showing a wrench and a manual, then please contact your local sales representative or distributor or support@staging.osstell.com.
其他产品
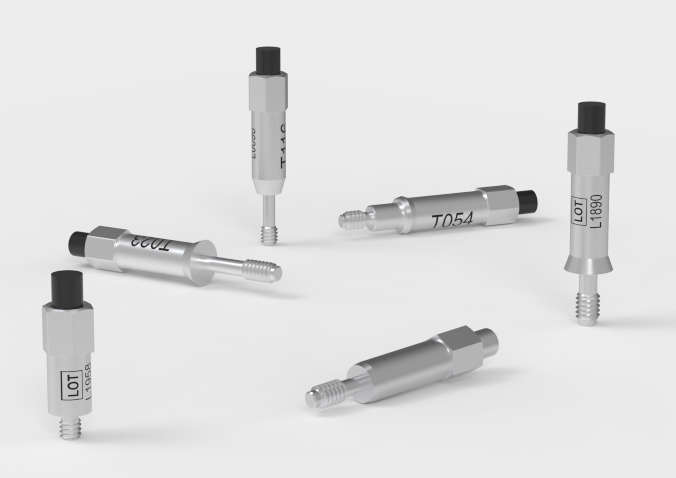
SmartPeg
SmartPeg™连接到种植体并与Osstell IDx、Osstell Beacon或Osstell ISQ测量仪结合使用。
OsstellConnect
OsstellConnect是一种免费的基于云的解决方案,为临床医生提供了一种新方法,通过数据提高牙种植体治疗效果。