第1步
为您的 Osstell Beacon 充电
使用前,为新器械充电 3 小时。
第2步
在 OsstellConnect 上注册 Beacon 并获得奖励
在 OsstellConnect 上注册 Beacon 即可免费获得 2 盒 SmartPeg(仅适用于新器械,售完即止)。
第3步
开始测量
按照 OsstellConnect“帮助”部分中的分步指南进行操作,或联系我们,以获得支持。

使用Osstell Beacon测量种植体稳定性
Osstell Beacon可在几秒钟内确定种植体稳定性。在本视频中,我们将向您展示如何测量。如需更多分步指南,请访问OsstellConnect帐户中的“帮助”部分。
转至OsstellConnect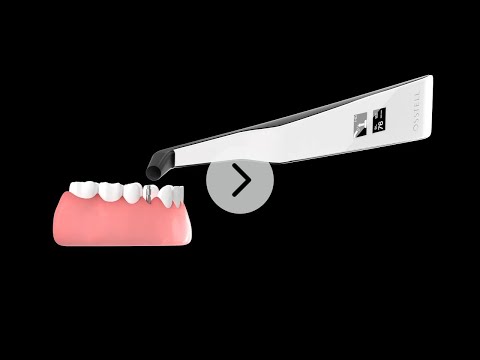

Osstell ISQ量表
ISQ,或者说种植体稳定系数,分为 1 到 99 的标度,用于量度种植体的稳定性。ISQ 量表与微量移动呈非线性相关。基于超过1500份科学参考文献,我们现在知道高稳定性意味着ISQ > 70,60–69属于中稳定性,ISQ < 60则表示低稳定性。
ISQ量表
Frequently asked questions
Charge the Beacon for at least 30 min in room temperature, then try again. If the error remains, try resetting the device by:
1. Identify the Beacon reset pin on the picture below.
![]()
2. With a paper clip, do a gentle press for 1 second on the reset button (Note! You may have to tilt the pin a little downwards).
If you see a “PadLock” symbol in the upper display, press one more time on the reset button.
If the Beacon still doesn’t start or the display is showing a wrench and a manual, then please contact your local sales representative or distributor or support@staging.osstell.com.
您需要帮助吗?
请填写表格,我们将尽快与您联系。请尽快联系我们!